Make Your Own Travel Book: Best Ideas to Start
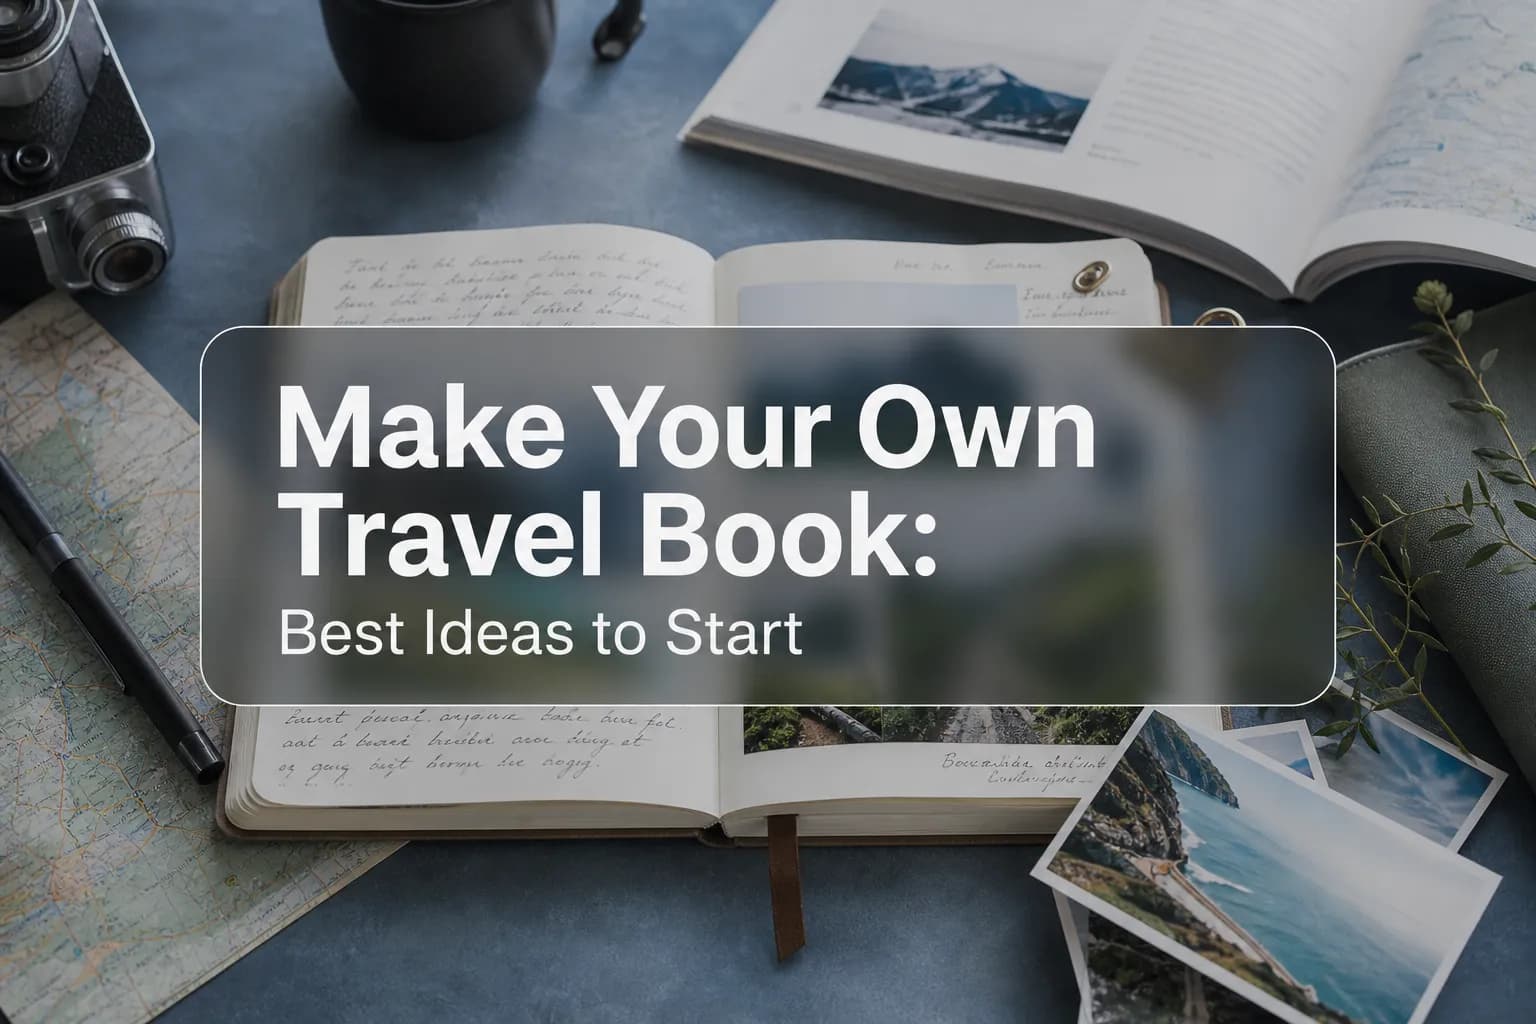
Photo 9
12 min read · June 20, 2026
Make Your Own Travel Book: Best Ideas to Start
A great trip deserves more than a forgotten camera roll. If you want to make your own travel book, the real challenge is usually not the photos themselves, but knowing how to shape them into something meaningful, beautiful, and easy to finish.
For families, couples, solo travelers, new parents, students, and gift buyers, the goal is the same: turn digital memories into a physical keepsake without spending hours dragging, dropping, and redesigning every page. That’s exactly where a smarter workflow helps. With Photo9, you can start online from any device, let AI generate polished layouts in seconds, preview everything in 3D, and still personalize every detail with text, backgrounds, and design tweaks.

"Approximately 70% of photos taken on smartphones are never revisited." - Popsa Memory Economy 2026 Report
"Six out of ten individuals print pictures they want to keep, and 68% say printed photos help them hold onto memories for longer." - Iceeni Magazine
Why people still create travel books in a digital world
Travel photos are easy to take and easy to lose. They get buried in folders, mixed with screenshots, and pushed down by everyday life. A printed travel book changes that. It gives your trip a beginning, middle, and end.
When you create your own travel book, you are not just storing images. You are:
preserving emotions, not just files
making your trip easy to revisit and share
turning a holiday into a gift-worthy object
creating a story your children, partner, or friends will actually look through
giving special moments a permanent place outside the cloud
That is why physical photo books still feel premium and personal. They are practical memory tools, but they are also emotional objects.
What the best travel books do differently
Most travel books fail for one simple reason: they try to include everything. The best ones are edited with intention.
A memorable travel book usually does three things well:
Element | What it does | Why it matters |
|---|---|---|
Clear story | Organizes the trip into a simple narrative | Makes the book easy and enjoyable to revisit |
Visual rhythm | Mixes full-page photos, small moments, and text | Keeps pages from feeling repetitive |
Personal details | Adds captions, dates, maps, notes, or quotes | Turns pretty pictures into meaningful memories |
Competitor articles often focus on choosing photos and adding captions. Useful, yes, but often incomplete. What they usually miss is how to reduce decision fatigue, create a cohesive visual flow, and finish the book fast enough that it actually gets ordered. That is where AI-powered design becomes a genuine advantage.
If you want a broader framework before you start, this guide to travel photo book ideas can help you decide what kind of story you want your album to tell.
How to choose the right concept before you start
Before you upload anything, decide what the book is about. Not just where you went, but what kind of memory you want to preserve.
1. The complete trip story
Best for longer holidays, honeymoons, backpacking routes, or family vacations.
Structure:
departure
arrival
highlights by day or place
best meals, views, people, and small moments
ending or “back home” page
2. The destination-focused book
Best if one place stole the show.
Examples:
one week in Tuscany
a road trip in Iceland
a city break in Tokyo
a beach escape in Greece
3. The theme-based travel book
Best when your photos fit a strong visual or emotional theme.
Themes might include:
food and markets
landscapes and nature
people you met
architecture
family moments
adventure highlights
4. The gift version
Best for birthdays, anniversaries, or a thank-you present after a shared trip.
This version is often shorter, more selective, and more emotional. Add notes, inside jokes, and short captions that make the recipient feel part of the story.
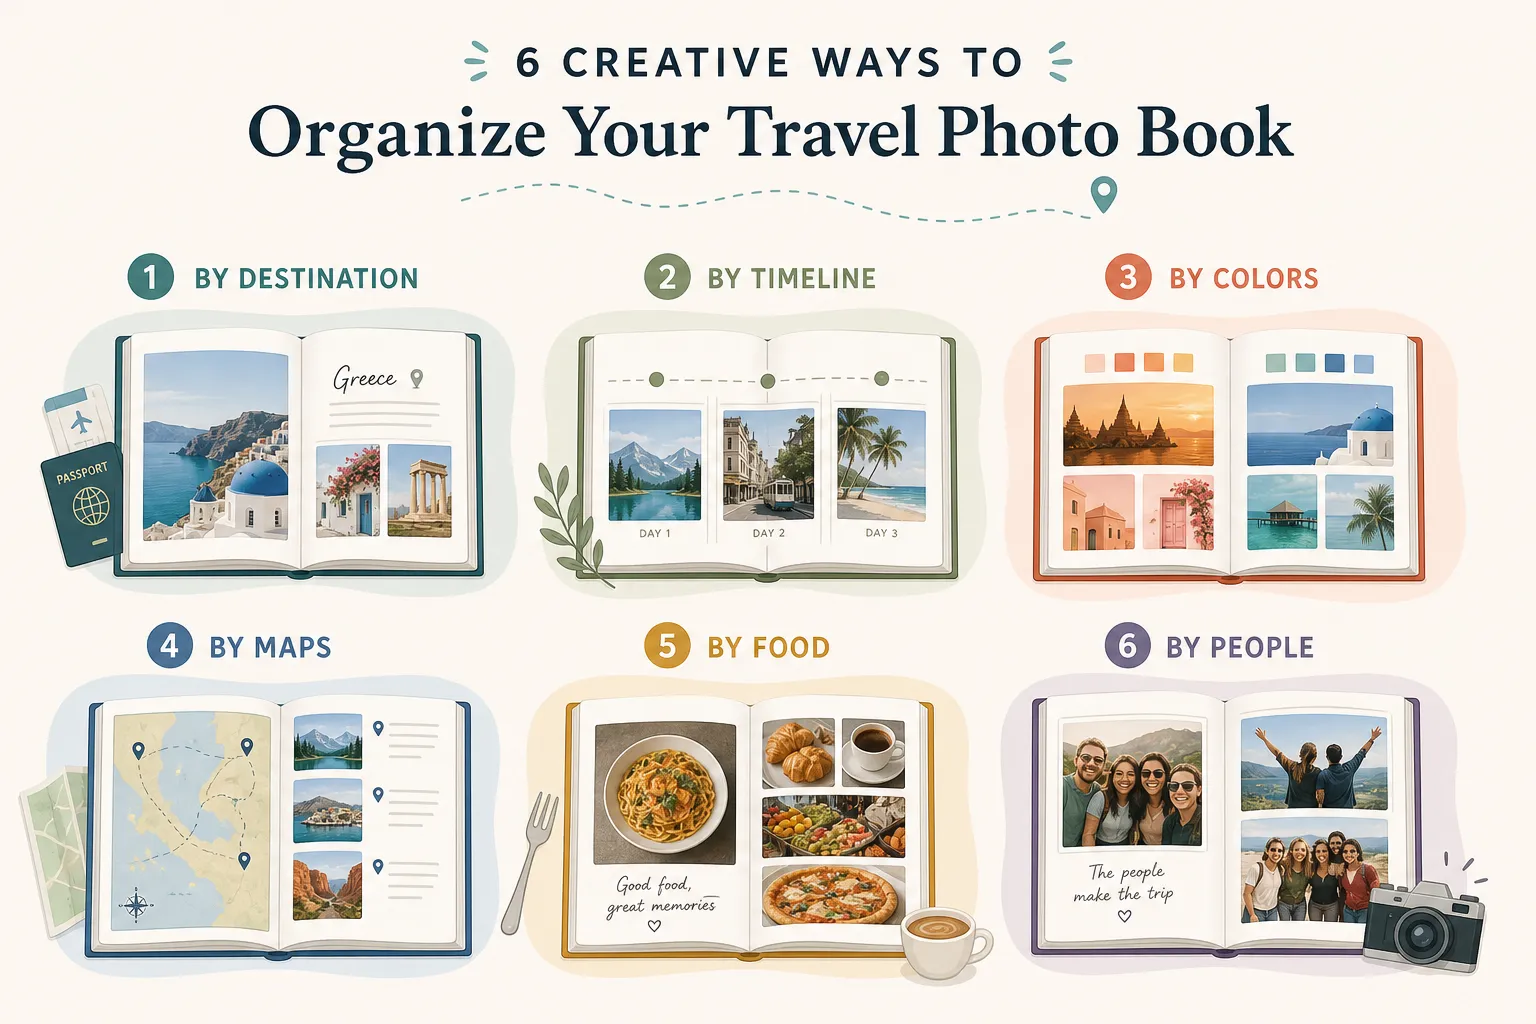
Best ideas to organize your travel book
Here are the strongest ways to organize pages when you make a travel book.
Organize by timeline
The simplest method. Start at the airport or journey out, then move day by day.
Best for:
first-time creators
multi-stop trips
family holidays
Organize by destination
Give each city, island, park, or region its own section.
Best for:
road trips
rail journeys
tours with many stops
Organize by mood or color
Group together golden sunsets, blue-water scenes, green hiking landscapes, or warm city evenings.
Best for:
visually driven books
design-conscious creators
shorter books with a premium feel
Organize by people
Build pages around who shared the journey:
couple moments
family fun
children’s discoveries
travel friends
locals and encounters
Best for:
emotional storytelling
family memory books
gift albums
Organize by experience
Instead of “day 1, day 2,” structure around:
food
adventure
relaxation
culture
hidden moments
Best for:
mixed photo collections
storytelling with more personality
Organize by “big and small” moments
Pair iconic photos with tiny details:
a mountain vista with your coffee stop
a famous landmark with the train ticket
a beach panorama with sandy feet
Best for:
books that feel intimate and real
A simple step-by-step process that actually works
Many people never finish because the process feels too manual. Here is a faster, more realistic way.
Step 1: Gather everything in one place
Pull together:
phone photos
camera photos
screenshots of reservations or maps
notes from your trip
ticket stubs or scans if you want to include them
Step 2: Cut ruthlessly
You do not need 300 similar sunset shots. Choose:
the sharpest image
the most emotional image
the one that best represents the moment
A stronger book with 60 excellent photos always beats a bloated one with 180 average images.
Step 3: Decide format first
Think about how your trip looks best:
landscape for scenery-heavy adventures
portrait for people and mixed storytelling
hardcover for long-term keepsakes and gifts
softcover for lighter, casual travel journals
Photo9 makes this easier by offering multiple formats and themes while keeping the creation process simple and app-free.
Step 4: Let AI do the first draft
This is where speed matters. Instead of placing every image manually, upload your photos and let Photo9 build a professional first version in seconds. The AI can suggest layouts, group images naturally, and remove the blank-page problem that slows most people down.
Step 5: Personalize strategically
Add:
city names
dates
one-line memories
short observations
map-style section intros
Avoid writing too much. The photos should lead.
Step 6: Review in 3D before ordering
A 3D preview helps you catch:
awkward crops
repeated images
unbalanced pages
text placement issues
Step 7: Print something worthy of the memories
Great travel stories deserve premium paper, strong color reproduction, and durable binding. Photo9 combines professional print quality, secure payment, reliable delivery, and a 100% satisfaction guarantee, with local printing when possible to reduce emissions.
Travel book page ideas readers rarely think about
This is one area where most competitor posts stay too basic. They mention captions and maps, but not the storytelling details that make a book feel finished.
Add an opening spread that sets the scene
Include:
destination name
travel dates
a favorite quote
a route overview
one hero image
Use transition pages
If your trip moved between places, create simple divider spreads such as:
“From coast to mountains”
“Three days in Lisbon”
“Our final island stop”
Include practical memory triggers
These tiny details bring the trip back instantly:
the name of the café with the best breakfast
weather notes
what your child kept saying
the song you played on repeat
the funniest travel mistake
Reserve one page for “things we don’t want to forget”
This can include:
best meal
best surprise
favorite photo
funniest moment
one thing we would do again
End with reflection, not just the last photo
Try closing with:
a final landscape
a short note about the trip
lessons learned
“next destination?” teaser
For more storytelling-focused inspiration, this article on making a travel photo book that tells your story is a useful next step.
How many photos should you include?
A common mistake is overfilling. Here is a practical guide.
Book type | Suggested photo count | Best approach |
|---|---|---|
Weekend city break | 30–60 | Focus on highlights and atmosphere |
One-week holiday | 50–90 | Mix hero shots and details |
Multi-stop trip | 80–140 | Use section dividers to keep it structured |
Family adventure | 60–120 | Prioritize people and key moments |
Gift album | 30–70 | Keep it selective and emotional |
A good rule: if two photos say the same thing, keep only one.
Design tips to make your travel book look polished
Keep one visual style
Choose one of these directions and stay consistent:
bright and airy
bold and colorful
clean and editorial
warm and nostalgic
Limit font choices
Use:
one font for titles
one font for captions
That is enough.
Mix page density
A book feels more premium when some pages breathe. Try a mix of:
full-bleed image pages
one-photo hero spreads
simple collages
text-led intro pages
Protect the best photos
Do not crowd your strongest images with too much text or too many neighboring pictures.
Use white space confidently
Minimal spacing can make a book look more expensive and deliberate.
What to write in a travel book
People often freeze when it comes to text. Keep it simple.
You can write:
location and date
a one-line memory
a mini story
what surprised you
a short quote
a child’s comment
a food note
“we want to come back here”
Examples:
“First morning in Porto, powered by coffee and zero navigation skills.”
“The beach we nearly skipped became everyone’s favorite day.”
“Rainy, cold, unforgettable.”
“She fell asleep five minutes after saying this was the best day ever.”
If text matters to your design, you may also like this guide to photo books that allow text without common layout mistakes.
Hardcover or softcover for travel memories?
Format | Best for | Advantages |
|---|---|---|
Hardcover | Big trips, gifts, honeymoons, once-in-a-lifetime journeys | Premium look, more durable, keepsake quality |
Softcover | Weekend escapes, student trips, casual yearly books | Lightweight, approachable, easy to create more often |
For many travelers, hardcover is the best option when the trip has emotional weight. It turns the book into something you leave on a shelf or coffee table, not in a drawer.
The easiest way to create one without design experience
The biggest barrier is not creativity. It is friction.
Traditional photo book creation often means:
sorting dozens of folders
dragging each image manually
resizing every layout
second-guessing every page
giving up halfway
Photo9 solves that with AI-powered design technology. You upload your travel photos, the system creates smart layouts in seconds, and you refine from there. No app required. No design background needed. Just a faster path from camera roll to finished keepsake.

Why this matters for busy people
If you are a parent, professional, traveler, or gift buyer, speed is part of quality. A tool that helps you finish the book while enthusiasm is still fresh is more valuable than one that offers endless manual options.
What makes Photo9 especially useful for travel books
AI-generated layouts in seconds
smart photo grouping and design suggestions
easy editing with text, backgrounds, and prompts
cross-device access
3D preview before checkout
premium print quality
secure payment
fast and reliable delivery
sustainable materials and recyclable packaging
local production when possible for lower emissions
Mistakes to avoid when you make your own travel book
Using too many similar photos
Repetition weakens impact.
Making every page busy
Your book needs moments of calm.
Ignoring the cover
A simple, striking cover instantly improves the final result.
Writing too much
Small, well-placed text is better than long diary entries.
Skipping context
Without place names, dates, or tiny notes, photos can lose meaning over time.
Waiting too long
The longer you wait, the harder it becomes to finish. Start while the trip still feels vivid.
Creative travel book themes to steal
If you need a quick idea, start with one of these:
Our first big trip together
One summer, five cities
The food diary version
A family trip through little eyes
Weekend escapes collection
Road trip mile by mile
Hiking, mountains, and muddy shoes
A honeymoon in chapters
Best of the year in travel
The “we almost didn’t go” book
These concepts work especially well when paired with clean layouts and a strong cover title.
Final thoughts: start before your memories go flat
If you have been meaning to create your own travel book, the best time is not someday. It is now, while the details still feel alive.
The strongest travel books are not the most complicated ones. They are the ones that turn real moments into a story you can hold. Start with a simple concept, choose only the photos that matter, add just enough text, and let technology remove the busywork.
Photo9 makes that process dramatically easier. With AI-generated layouts, simple online editing, premium materials, and fast delivery, you can go from scattered travel photos to a polished keepsake in minutes instead of hours. If you want to make your own travel book without needing design skills, Photo9 is built for exactly that.
FAQ
How do I make my own travel book?
Start by gathering your best trip photos, choosing a clear theme or structure, and removing duplicates. Then use an online tool like Photo9 to upload your images, generate an AI-designed layout, add captions or dates, and review everything before printing.
How to make a good travel book?
A good travel book has a simple story, strong photo selection, and enough personal detail to make it meaningful. Focus on your best images, mix full-page moments with smaller details, and add short text like locations, memories, or highlights.
What are good ideas to make a book?
You can organize a book by destination, timeline, people, mood, food, or experiences. Popular ideas include a honeymoon album, road trip book, family vacation memory book, or a themed travel story built around favorite places and moments.
How to make a good travel book?
Choose a format that fits your trip, keep the design consistent, and avoid overcrowding pages with too many similar photos. Using AI layout suggestions, a 3D preview, and premium print options helps you create a book that feels polished and lasting.